Want to learn some pretty cool hacks that can save you a good amount of time. If yes, then you cannot afford to miss this article on How to batch rename multiple files in Windows?
So, let’s get started:
How to Batch Rename Multiple Files in Windows?
Let’s say you went for a picnic with your family and wanted to rename all the image files with a common name. How would you do that? Doing it manually will take a hell of a lot of time. If you have ever encountered such types of experiences, then this article is a must-see for you.
This article will show you the methods available for renaming multiple files in one go. There are multiple methods for doing so. Let’s explore them one by one:
Method 1:
Step #1: In this very first step of this method, you are required to navigate to the folder which contains all those files which you want to batch rename. Once you have done that, then you can now move on to the next step for further proceedings.

Step #2: Now, you have access to the files. So, all that you need to do is to select all those files which you want to rename.
Once you have done that, then you are now required to right-click on one of these files. Remember that; all those files still need to be selected. Now, from the menu that follows after right-clicking, you are now required to select rename.
Now, rename the file with whatever name you want that to be.

Once you are done renaming all that you need to do is to hit enter and boom, you will have all the files renamed with the specific text you just entered. You will have an output similar to what we have shown below.

Method 2: Using Command Prompt.
This method might be helpful for tech-savvy people. Or for those people who love to play with the terminal or the command prompt. So, let’s see how to quickly rename multiple files in Windows using the command prompt.
Step #1: So, first of all, you will have to open the command prompt terminal on your Windows system. For that, you can go to the start menu and then type “cmd” or “command prompt” and then click on the appropriate result. This will open the command prompt terminal for you.
Once you are up with the command prompt terminal, you can now move on to the next steps.
Step #2: Just in case, if you want to rename just a single file using the command prompt then you need to use the following command which has the syntax as ren “Current_Name.The extension” “New_Name.Extension”
So, if you want to rename a file that has a current name as “Knowledgecage.jpg” to “KC demo.jpg” then you need to type the following command
ren “Knowledgecage.jpg” “KC demo.jpg.”
Please take note that quotes play a vital role in this if your name is having spaces in between. Like I have shown you in the example. And if the name doesn’t consist of spaces then you can skip using the quotes.
However, we are not concerned about renaming a single file. So, let’s see how to batch rename multiple files in Windows? Using command prompt. This method will specifically help you in renaming the extensions.
So, the command used for renaming multiple file extensions at once using command prompt goes as:
ren *.html *.php

This example tells the system to turn all the selected files with the .html extension to the .php extension. The * wildcard tells that no matter what name the file as if it has a .html extension, you got to convert that to .php.
This is a great life hack for many of us. You can consider using it on a regular basis to save some of your time. You can indeed make a batch file to automate this stuff. Likewise, you can also rename multiple filenames at one go using Windows PowerShell.
Other than these, you can also make use of some third-party software that allows you to rename multiple files using a GUI interface.
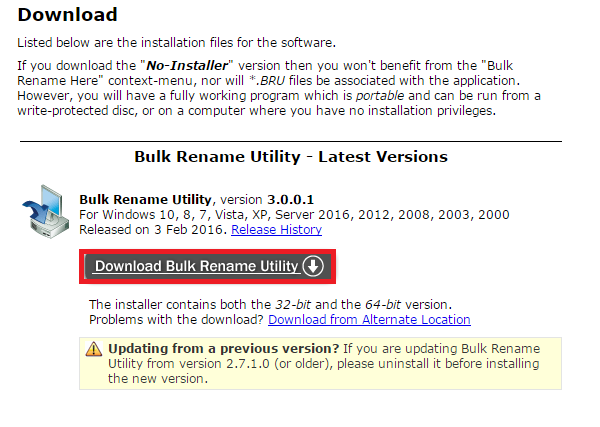
So, let us tell you about one of that software. The name of the software is Bulk Rename Utility. You can reach the utility by clicking on this link. This software has quite an outdated user interface, but that doesn’t show up in its core functionality. This software is quite handy and is very useful for renaming multiple files at once.

So, all that you need to do is to click on the link which is provided above and download the free Bulk Rename Utility. Once you have done that, then you are now required to install the tool on your system. This can be done easily by following the on-screen instructions till the finish button is not encountered.
So, by now, you must have the bulk rename utility installed on your system. This is exactly where the actual work begins. Now, you need to select those files which you want to rename.
In the dashboard itself, you will see many panels. Just change the options which are available on the panel and just by doing that you will be able to see the changes to happen in a preview state.
You can get used to this tool once you begin using it on a regular basis. Just explore the various options available and things will get easy despite the cluttered interface of the tool.
So, this was all about How to Batch Rename Multiple Files in Windows? Do we hope that this might have helped you in your quest of How To Quickly Rename Multiple Files Using Windows Shortcuts?
If you liked this article, then do let us know through the comments section. We would love to hear from you. Also, share this article with your peers.
Thank you for crossing by and giving it a read.
Stay tuned and keep visiting for more.
Quick Links
