Proxifier is a tool needed to link a proxy with apps that don’t normally support proxy use. It allows you to run any internet-based application—like web browsers, chat apps, and account management tools—through a proxy server.
This means you can increase your online security and privacy by routing your activity through other servers, which conceal your computer’s actual information.
Here’s a detailed guide on how to use Proxifier proxies for all your internet connections or just specific applications.
What Is A Proxifier?

Proxifier is software you can use on your computer to make apps connect to the internet through a proxy server, even if those apps don’t usually let you do that. This means you can use Proxifier to hide or change your IP address when using any app.
You can choose to use Proxifier for everything you do online, just for certain apps, or set up special rules for when and how apps use a proxy. It also lets you see live updates on your internet use and check for any connection problems.
Proxifier offers a free trial for 31 days, but after that, you have to pay $39.95 to keep using it. This one-time payment lets you use Proxifier forever, including any small updates they make.
Remember, Proxifier doesn’t come with a proxy server. You need to get your proxy server from somewhere else to use with it.
Why Use Proxifier?
Proxifier is a handy and adaptable program that can do a lot more than just work with proxy servers for apps that don’t usually support them. Here’s what else it can do:
- It can help you access websites and online services that are blocked on certain networks.
- You can set it up to route your internet traffic through several proxy servers one after another for extra privacy or to bypass tough restrictions.
- You can create specific rules so that only certain apps or websites go through a proxy, while others connect normally.
- It can improve your online gaming experience by reducing delays or making it seem like you’re connecting from a different location.
- It allows apps to use internet connection methods or security features they weren’t originally designed to use, like letting an app that usually doesn’t support SOCKS5 proxies to do so.
Is There a Proxifier for Mac, Linux, or Android?
Proxifier works on computers with Windows (both a regular and a portable version) and macOS, but it doesn’t work on Linux computers or Android phones.
If you use Linux, you can use something similar called Proxychains. For Android phones, there’s an app called Postern you can try.
How to Configure Proxifier?
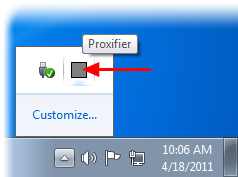
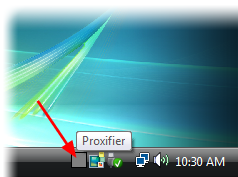
Launch Proxifier after installing it. The Proxifier system tray icon will show traffic (information flow). Windows 7 allows hiding the icon.
 |
 |
- Open the Program:
You can double-click the Proxifier icon near your computer’s clock to open it. Or, you can open it from your computer’s Start Menu. If it’s already running, doing this will just bring up its main window.
- See Detailed Information:
Normally, Proxifier skips over regular internet connections. But, if you want to see more details about these connections, like web addresses it’s connecting to, go to the Log menu, choose Output Level, and then select Verbose.
- Handle Direct Connections:
If you don’t want to use a proxy for some connections, you can tell Proxifier to process these directly. Go to the Profile menu, choose Advanced, and then click on Handle Direct Connections. This is useful for fixing problems or using Proxifier’s tools to check on your internet usage.

- Set Up a Proxy Server:
To have your internet connections go through a proxy server, you first need to tell Proxifier about your proxy. Click on Proxy Servers in the Profile menu or click the proxy icon on the toolbar to add your proxy server information.
| WARNING!
Proxifier includes built-in proxy settings which should be disabled if you were using proxies before installing it. In this case, you should configure your applications to connect “directly” to the Internet (instead of through proxies). |
- In the new dialog window, click the Add button:

Then, fill in the form with the proxy server’s details (address, port, protocol, etc.) and click OK.
You will be asked by proxifier whether you want to use this proxy by default. If you want it to be the target of the Default Proxification Rule, click Yes. The Proxification Rules can be changed at any time.
- When your proxy server appears in the list, click OK to confirm its use:

Once you’ve set up a proxy server in Proxifier, any new internet connections (like when you visit a website or use an online app) will go through this proxy as long as Proxifier is on.

If you don’t want every connection to use the proxy, just certain ones, you can set specific rules (Proxification Rules) or choose manually which connections to proxy (Manual Proxification Mode).

Proxifier will minimize to a small icon near your clock (the System Tray) when you close its window. You can change this by going to View and then clicking on “Icon in the System Tray.”
To close Proxifier when it’s minimized to the System Tray, right-click on its icon and choose Exit.
If you want Proxifier to start up automatically every time you turn on your computer, go to File and then enable the Autostart option.
How is the User Interface?

Proxifier’s main window looks like this:
Proxifier has four main sections: Connections, Traffic, Statistics, and Output. You can move these sections around, change their size, hide them, or close them as you like.
To turn these sections on or off, use the View menu, then click on Windows. The way you arrange these sections will stay the same even if you restart Proxifier.
If you want to go back to the original layout, use the View menu and click on Reset Layout.
Connections Section
Here, you see a list of everything Proxifier is managing for you, along with their status. The details about each connection are organized into different categories:
- Applications: Shows the name of the program using the connection, its process ID (if you’ve chosen to see more detailed information), and a “*64” if the application is a 64-bit one.
- Target: Displays where the connection is trying to reach, including the address and port number.
- Time/Status: Tells you how long it’s been since the last update on the connection’s status. Statuses can be Connecting (shown in blue), Closed (gray), Failed or Canceled (both red). Active connections don’t have a status shown.
- Rule: Proxy: Shows the rule name and the proxy or chain being used. If there’s no proxy, it says “direct connection”.
You can click on the column titles to sort the list by any of these details.
On the left side of the Connections window, there’s a toolbar with three buttons that let you change how big the list items are, close a connection, or stop a process completely. You can also do these things by right-clicking to open a menu.
Traffic

The Traffic section in Proxifier shows you a chart that tells you how much data is being sent and received.
- The blue color shows the data coming into your computer.
- The green color shows the data you’re sending out.
- Horizontal black lines show you how fast the data is moving.
- A white line shows the average speed of the data during the time you’re looking at.
You can use the buttons on the toolbar or right-click to open a menu where you can change how often the chart updates and what kind of chart you see, and clear the chart to start over.
Statistics
This pane shows various statistics about Proxifier’s activity, including the number of active connections, the number of failed connections, and the time Proxifier has been running.
You can copy the statistics to the clipboard using the corresponding toolbar buttons or reset all counters using the context menu (right-click).
Output
The Output section in Proxifier shows all the messages in real-time, like a live diary of what’s happening. Each message tells you:
- Time and date in this format: month.day hour:minute:second (like 12.01 15:30:45 for December 1st at 3:30 pm and 45 seconds).
- Application name, and if it’s a 64-bit app, it’ll have an “x64” mark, plus the process ID (a unique number for the app while it’s running).
- Target is where the connection is going, like a website address or an IP address.
- Event description, telling you what happened, such as a connection starting or stopping, an error, etc.
- Additional information, like how long the connection lasted or what the error was.
- You can control how much detail you see in the Output section under the Log menu, then
Output Level. There are three choices:
- Error only: Shows only errors and very important messages.
- Normal: Shows errors and basic info about connections starting or stopping. This is usually the best choice.
- Verbose: Shows everything, including detailed steps like rule checks and DNS requests, which is helpful for fixing problems.
You can also save these messages to a file for later review by choosing an option in the Log menu.
Is there a Trial Period for Proxifier?

Yes, there is a trial version of Proxifier, which is free to use, has a couple of limitations:
- It stops working 31 days after you install it.
- Every time you start Proxifier, a window pops up with information about the program.
- These are the only ways the trial version is different from the paid version.
When you buy Proxifier, you’ll get a special code (called a registration key or serial number) that removes these limitations, letting you use the program without these restrictions.
Quick Links:
- What is a Proxy Server for PS4?
- What are Shared Proxies?
- How to Test Proxies?
- How Proxies Help Improve Ad Verification?
Conclusion
In the end, if you’re a gamer looking for faster internet, someone who needs to get around blocked websites at work, or just worried about keeping your online activities private, Proxifier is a great choice.
It’s easy to use, can be adjusted to fit your needs, and has lots of helpful features. All of this makes it a good investment for making your time online better.