Changing proxy settings can be a bit of a pain, especially if you have to do it a lot. That’s where Proxy SwitchyOmega comes in handy.
It helps you manage your proxy settings easily, so you can keep your online activities private without all the hassle. If you’re tired of dealing with proxies manually, this guide will show you how to use SwitchyOmega on Chrome!
What is Proxy SwitchyOmega?
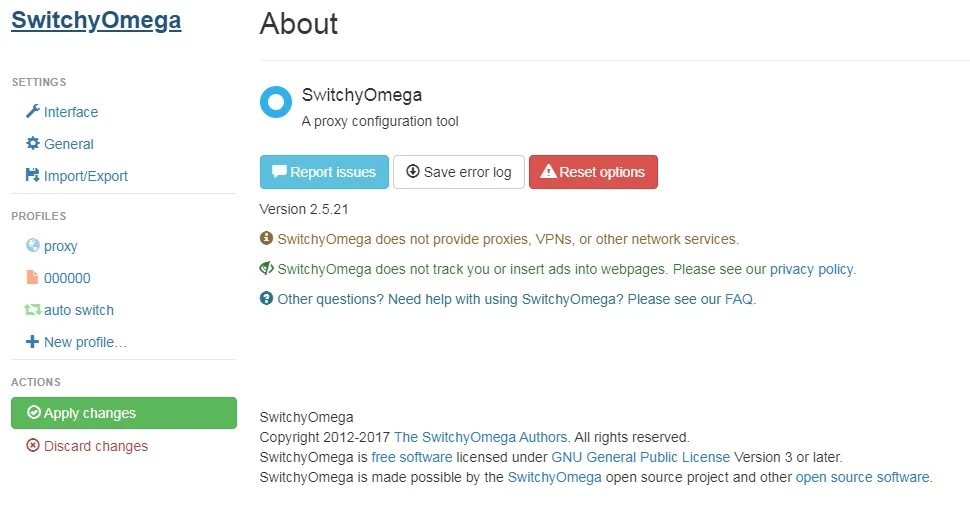
Proxy SwitchyOmega is a browser extension that you can add to your web browser. It helps you manage your internet settings, called proxies.
With it, you can make different proxies for your profiles. For instance, you can have one profile for work, one for getting around website restrictions, and another for staying safe online.
It works with Chrome and Firefox browsers, and you can easily switch between your profiles with just a few clicks. Best of all, it’s free!
You can get it by adding it as an extension from your browser’s store or plugin section. If you want more info, you can also check out the SwitchyOmega page on GitHub.
Key Features
Proxy SwitchyOmega is great for all kinds of people. Whether you’re someone who cares about online security, a web developer testing websites from different places, or just someone who wants to access content blocked in your area, this extension is helpful.
Here are some of its features:
- Auto-Switch Mode: This makes the extension switch between different proxy settings automatically based on the rules you set. For example, you can tell it to use a specific proxy for certain websites.
- PAC Script Support: For those who need more advanced settings, SwitchyOmega supports Proxy Auto-Configuration (PAC) scripts, which allow for more customization.
- Backup and Restore: Worried about losing your settings? SwitchyOmega lets you backup and restore your profiles, so you don’t have to worry about losing them.
How to Install Proxy SwitchyOmega
It is necessary to install SwitchyOmega in order to begin managing your proxies more easily. You only have to click a few times to complete the process. You can do this by following these steps:
- Go to the Web Store: Open your browser (Chrome, Firefox, or Edge) and go to the extension marketplace. Search for “SwitchyOmega” using the search bar.
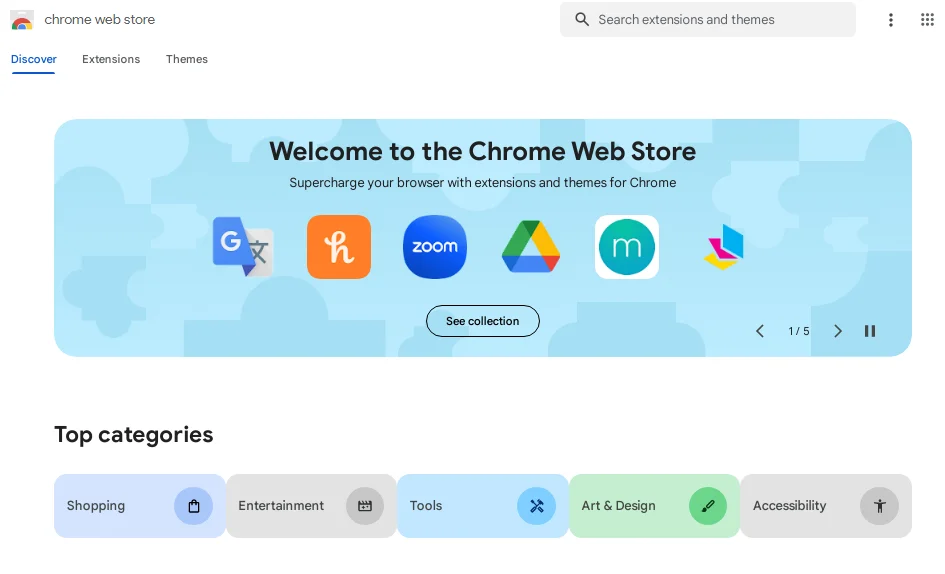
- Install the Extension: When you find SwitchyOmega in the search results, click on it to go to the extension’s page. Look for the “Add to (Browser)” button and click it. You’ll see a pop-up window asking for permission to access certain data or features. Click “Add Extension” to finish installing.
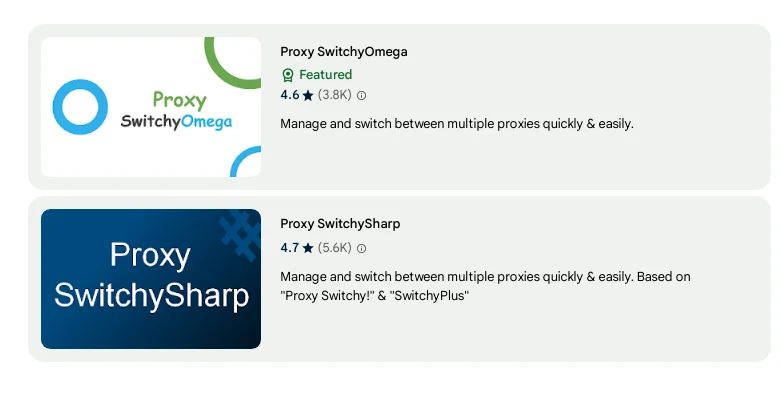
- Confirm Installation: After a moment, the installation will be complete, and you’ll get a notification confirming it. You’ll also see the SwitchyOmega icon next to your browser’s address bar. This icon is important for managing your proxies, so make sure to familiarize yourself with it.

Basic Proxy SwitchyOmega Configuration
Now that you’ve got SwitchyOmega installed, it’s time to set it up according to your needs. This extension has an easy-to-use interface, making it simple to configure your proxy profiles. Let’s go through the basic steps to help you get started.
1. Accessing the Dashboard
To get started, click on the SwitchyOmega icon that’s next to where you type in website addresses. This will make a menu appear. From there, choose the ‘Options’ button.
This is like the main control panel for SwitchyOmega. It’s where you can set up and control all your different proxy profiles. It’s where you make all the important decisions about how your proxies work.
2. Creating a New Profile
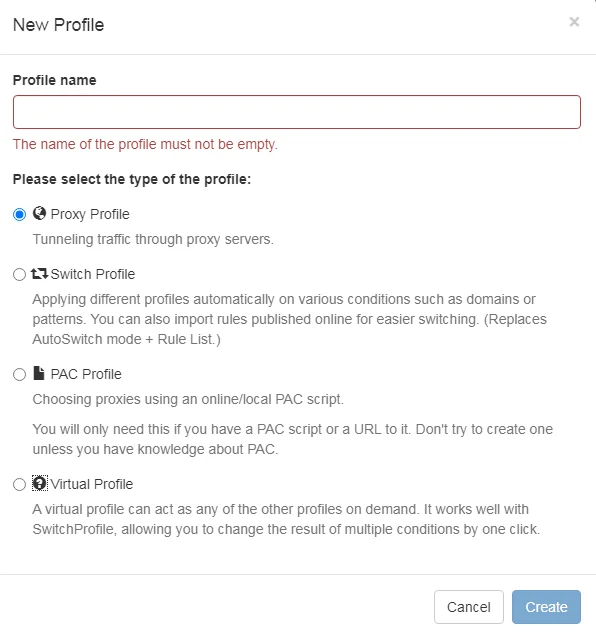
When you’re in the dashboard, you’ll find a button to create a new profile. Click on it, and you’ll be asked to choose the type of profile you want to make.
If you need a simple setup, go for the ‘Proxy Profile’ option. Give your new profile a name that tells you what it’s for, like “Work VPN” or “Streaming Service.” This makes it easier to find it later when you need it.
3. Adding Your Proxy Details
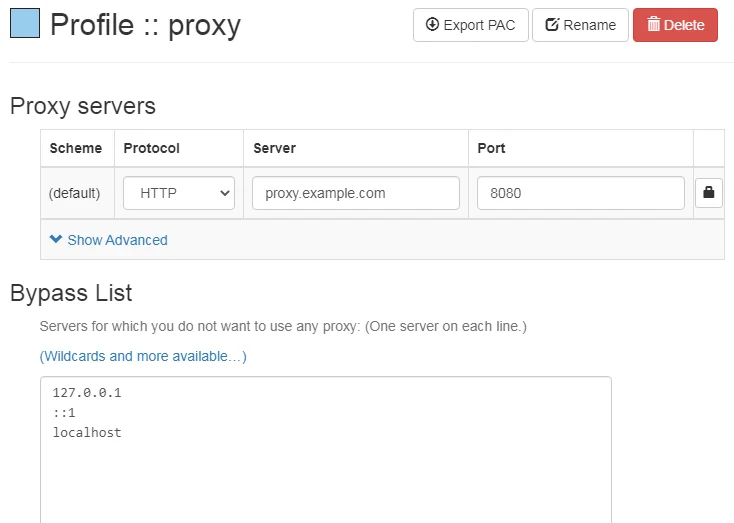
Once you’ve made a new profile, you’ll need to enter the details of your proxy server. You’ll see boxes where you can type in the server address, port number, and the type of proxy (like HTTP or SOCKS5).
Just follow the instructions from your proxy provider to fill in these details correctly. Don’t forget to save your settings when you’re done.
4. Testing the Profile
Before you start using your new profile, it’s smart to check if it works properly. To do this, switch to the profile you made by picking it from the menu that pops up when you click on the SwitchyOmega icon in your browser.
Then, try going to a website to see if the proxy works like it should. This helps you make sure everything is set up correctly before you start using it regularly.
5. Proxy Quick Switching
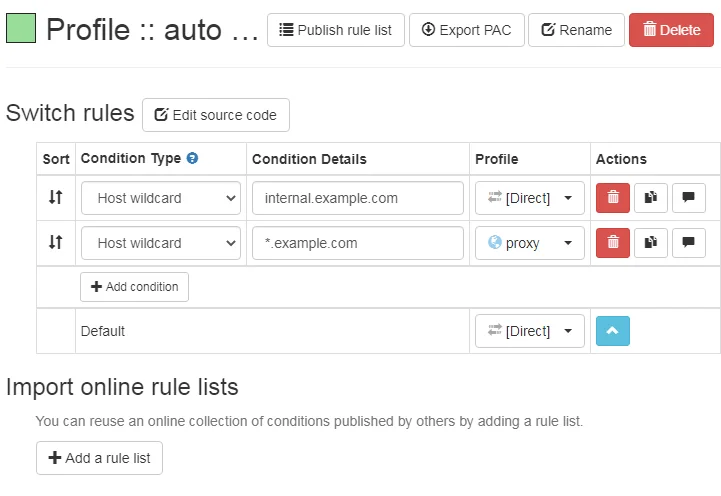
One great thing about SwitchyOmega is how fast you can switch between different profiles.
After you’ve set up a few profiles, you can quickly change between them by clicking on the SwitchyOmega icon and choosing the profile you want to use from the list that pops up.
This makes it simple to switch between different proxy settings depending on what you need at the time.
How to Optimize Your Proxy Settings?
Once you understand how to use the basic features of SwitchyOmega, you might want to learn how to make it work even better for you.
Optimization means making small adjustments to get the best results from this useful tool. Here’s how to tweak your settings to make SwitchyOmega work even better for you.
1. Set Proxy SwitchyOmega to Auto-Switch Mode
SwitchyOmega’s Auto-Switch Mode is a big deal. It lets the extension switch between different proxy profiles all by itself based on the rules you set. This means you don’t have to switch profiles manually, which makes browsing smoother.
Here’s how to set it up:
- Click on the SwitchyOmega icon and choose Options to open the dashboard.
- Select Auto Switch from the menu on the left.
- Add rules that tell SwitchyOmega which proxy profile to use for certain websites or IP ranges.
- Save your changes.
2. Implement PAC Scripts for Customization
If you need a special way to set up your proxies, SwitchyOmega can help with Proxy Auto-Configuration (PAC) scripts.
These scripts let you make detailed rules for using different proxies. It’s a bit tricky, but it lets you customize your setup in ways simple profiles can’t.
Here’s how to do it:
- In the SwitchyOmega dashboard, make a new profile and choose PAC Profile.
- Put your PAC script in the box provided.
- Save your new profile.
3. Prioritize Your Profiles
If you have many profiles, it’s helpful to organize them based on how often you use them. SwitchyOmega lets you do this by rearranging the order of your profiles. This small change can save you time in the future.
Here’s how:
- Open the SwitchyOmega dashboard.
- You’ll see a list of your profiles on the left side of the screen.
- Click and hold on to a profile, then drag it to where you want it in the list.
- Release the mouse button to drop it in its new position.
Now, when you click on the SwitchyOmega icon in your browser, your profiles will appear in the order you’ve chosen. This makes it easier to find and use the ones you need the most.
Troubleshooting Common Issues:
SwitchyOmega does not exclude the possibility of encountering issues, even though it is one of the most reliable tools available.
Most problems you encounter can be resolved with a little troubleshooting. The following guide will help you fix some common issues.
1. Proxy Not Switching
Problem: Even after changing your proxy settings, your browser still uses the old ones.
Solution:
- Make sure you’ve saved the new settings in SwitchyOmega.
- Refresh the webpage you’re on.
- If it’s still not working, close and reopen your browser, then try again.
2. Slow Connection Speed
Issue: Your browser is still using the old proxy settings even after you’ve changed them.
Solution:
- Confirm that you’ve saved the new settings in SwitchyOmega.
- Refresh the webpage you’re currently viewing.
- If the problem persists, close your browser and reopen it, then try again.
3. Extension Not Loading
Problem: There is no feature of SwitchyOmega, or the dashboard won’t open up.
Solution:
- First, try turning off and then turning on the SwitchyOmega extension from your browser’s extension settings. This might solve the problem if it’s just a temporary glitch.
- If that doesn’t work, uninstall SwitchyOmega completely and then install it again. Sometimes, reinstalling can fix any underlying issues with the extension.
4. Auto-Switch Not Working
Issue: The Auto-Switch feature isn’t changing profiles as it should be based on your rules.
Solution:
- Check your Auto-Switch settings in the SwitchyOmega dashboard. Make sure they’re set up correctly.
- Test the conditions by going to the websites you’ve set rules for. See if the profiles change as expected.
- If it’s still not working, try closing your browser and opening it again. Sometimes, a restart can fix the problem.
5. PAC Script Errors
Issue: You’re having problems or seeing errors when using a PAC profile.
Solution:
- Look over the PAC script carefully to see if there are any mistakes in the way it’s written or if any settings are wrong.
- Try using a different proxy to see if the problem is with the server you’re trying to connect to. This can help rule out any server-related issues.
How to Use SwitchyOmega Effectively?
When you know how to use SwitchyOmega effectively, its full potential is unlocked. The following tips and tricks will help you elevate your experience.
1. Use Keyboard Shortcuts
Keyboard shortcuts are handy because they let you switch between profiles without interrupting what you’re doing. This is great if you use different web services that need different proxy settings. Here’s how to set them up:
- Open the SwitchyOmega options page.
- Click on the General tab.
- Here, you can choose and set keyboard shortcuts to switch between profiles quickly.
2. Set Up Temporary Profiles
Temporary profiles are great when you need specific proxy settings for a short time. For instance, if you’re testing proxies with websites from different places, a temporary profile lets you do this without adding more profiles to your list.
Here’s how to make one:
- Click on the SwitchyOmega icon in your browser.
- Choose “Temporary Profile” from the options that appear.
- Set up the proxy settings you need for this temporary use.
- Click apply to use these settings temporarily.
3. Use the Bypass List
The Bypass List is helpful for people who visit both local and international websites often. By putting trusted or local sites on this list, you can access them directly without going through a proxy.
This can save you time and avoid any delays that might happen with using a proxy.
Here’s how to use it:
- In your chosen profile, look for the Bypass List section.
- Add the URLs or IP addresses of the sites you want to skip the proxy for.
- Once you’ve added them, you’ll be able to connect to these sites directly without going through the proxy.
4. Sync Profiles Across Devices
Syncing profiles across devices is helpful because it makes sure you have the same browsing experience no matter which device you’re using, like switching from a desktop computer to a laptop or a mobile device.
This is especially handy for professionals who need to keep the same proxy settings across different workstations.
Here’s how to do it:
- Go to the SwitchyOmega options page.
- Click on the Import/Export tab.
- Use the Export feature to save your settings.
Then, on another device, use the Import feature to bring in those settings. This way, your profiles will be synced across all your devices.
5. Use Condition Types in Auto-Switch
Using different condition types in Auto-Switch gives you more control over your proxy settings.
For example, you can set up rules that only apply in certain situations, like when you’re accessing a specific type of content or during certain times of the day.
Here’s how to do it:
- In the Auto-Switch settings, look for an option called “Condition Type.”
- You’ll see various conditions to choose from, like Host Wildcard or URL Regex.
- Pick the condition type that best fits what you want to do. This helps you customize when your proxy settings change based on specific situations or criteria.
How Proxy SwitchOmega Enhances Privacy and Security?

SwitchyOmega is known for being easy to use, but it’s also great for keeping you safe online. It’s like giving your proxy server a boost with ProxyOmega.
By managing your proxy settings well, SwitchyOmega adds extra protection beyond just being handy.
1. Encrypted Connections
Encrypting your connection means making it hard for others, like hackers, to see your data or government groups as well. This is really important, especially when you’re using public Wi-Fi, which isn’t always safe and can be easily attacked.
When you use a Proxy or VPN service that encrypts connections, SwitchyOmega makes sure your internet traffic goes through these safe channels.
2. IP Address Masking
Hiding your IP address means keeping your online identity private so websites and services can’t track what you do online. This is super important for people like journalists, activists, or anyone who wants more privacy online.
With SwitchyOmega, you can quickly switch between different proxy servers, which hides your IP address.
3. Geo-Spoofing
Geo-spoofing lets you pretend you’re in a different place than where you actually are. This is handy because it helps you access content that might be blocked in your real location. It also gives you more privacy because it makes it harder for others to track what you’re doing online.
You can do geo-spoofing by using proxy servers from different countries. This makes it seem like you’re browsing from a different location than where you really are.
Quick Links:
- What Is An Open Proxy?
- How To Configure A Proxy Server On iPhone and iPad?
- How to Configure a Proxy Server on Android?
- Guide on How to Use Proxies to BP Proxy Switcher?
Final Thoughts
SwitchyOmega is more than just a tool for managing proxies; it’s a complete solution for making your online experience better. It’s easy to use and has strong security features, giving you a lot of options to customize and control your browsing like never before.
By learning all its features and following the tips and tricks in this guide, you’re not just using SwitchyOmega—you’re making it even better. You’ll have a safer, faster, and more private browsing experience.
